How to Easily Build a Malware Testing Lab with Elastic EDR and TCM's AD Lab
Learn how to easily create your own malware testing lab with a pre-configured Elastic EDR in Docker, integrated with TCM Security’s AD lab for malware evasion testing.
Table of Contents
Introduction
I wanted to test malware evasion techniques specifically against Elastic EDR, so I decided to build an Active Directory (AD) lab for this purpose.
In this blog post, I’ll guide you step-by-step on how to create your own malware testing environment.
We’ll containerize Elastic EDR using Docker, with a fully pre-configured setup that includes Elasticsearch, Kibana, Fleet, and the Detection Engine.
For the AD lab, we’ll use TCM Security’s Active Directory Lab as the foundation.
Initial Lab
This section focuses on creating 3 VMs: 1 Domain Controller and 2 User Machines.
This initial lab is based entirely on TCM’s Active Directory Lab from the Practical Ethical Hacking Course. I highly recommend checking out their course.
However, you can use any lab environment you prefer, such as GOAD.
- Pre-requisites
- Setting up the Domain Controller
- Setting up the User Machines
- Setting up Users, Groups, and Policies on the Domain Controller
- Join User Machines to Domain
Pre-requisites
Recommended Specs:
- 60 GB Disk Space.
- 16 GB RAM.
Download necessary ISOs:
Download a virtualization software:
- VirtualBox.
- Hyper-V.
- VMware Workstation Pro.
- I will use this one.
- You can download it here.
- I recommend the version 17.5.1 since it has more features than 17.6.
Setting up the Domain Controller
Creating the Domain Controller VM
- After opening VMware, click on “Create a new Virtual Machine”.
- Next, Select the configuration
Typicaland clickNext. - Select
Installer disc image file (iso), and select theSERVER_EVAL_x64FRE_en-usfile you download. - Click
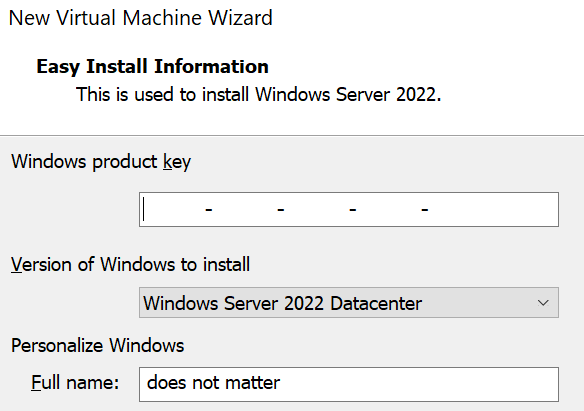
Next, and you should see this window: - We won’t be using Easy Install, so click
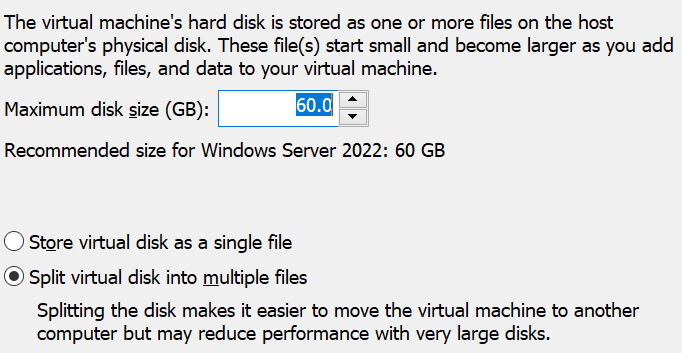
Next. - You can use the default Disk options, and click
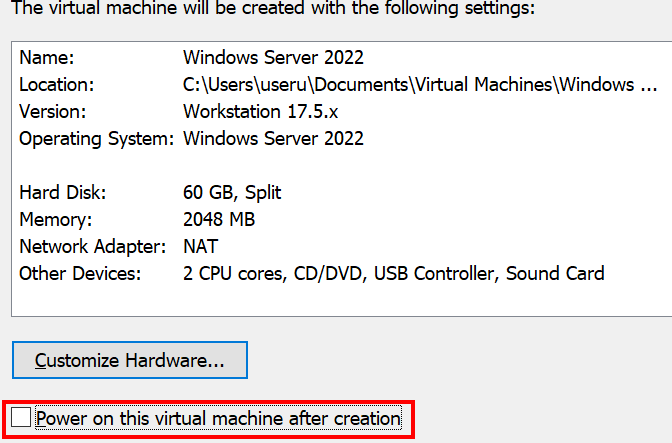
Next. - Uncheck
"Power on this virtual machine after creation", and clickFinish. - Click on
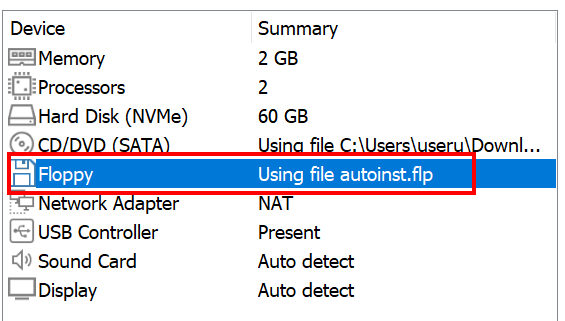
"Edit Virtual Machine Settings". - Do the following:
- Power the VM.
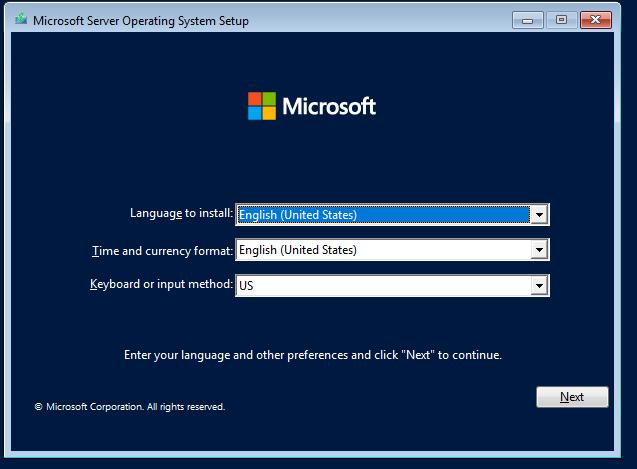
- Press Enter 1-2 times and you should see this screen:
- Click
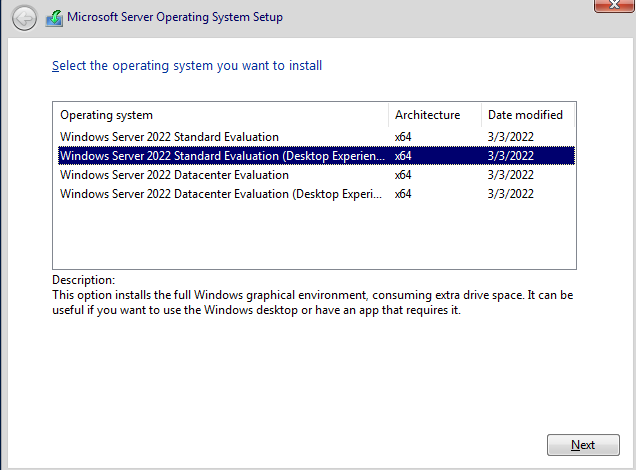
Next > Install. - Select
"Windows 2022 Standard Evaluation (Desktop Experience)", and clickNext. - Accept the License terms, and click
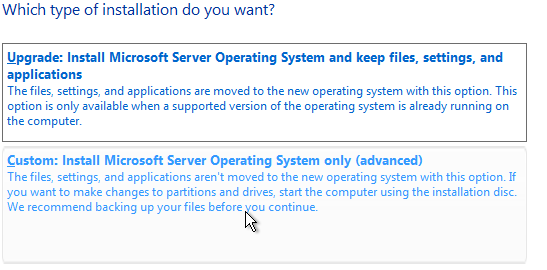
Next. - As the type of installation, Select
Custom: - Click
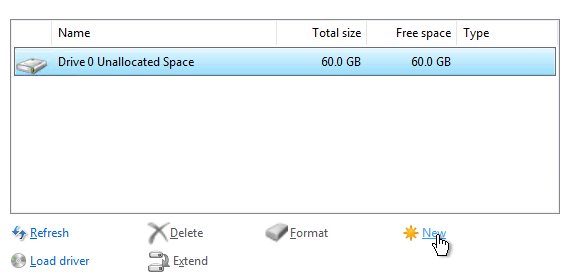
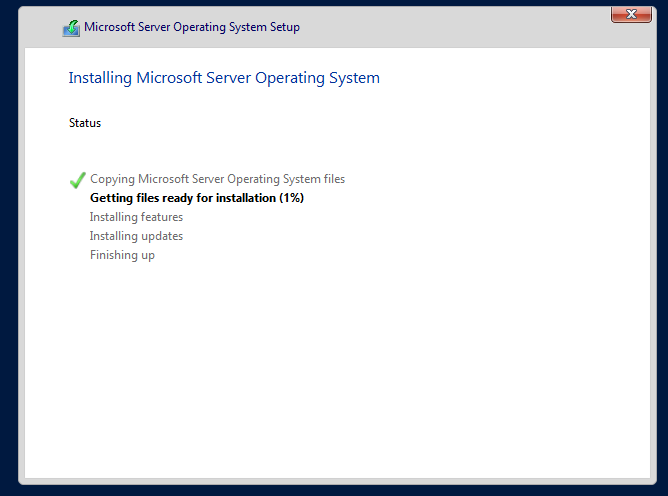
New > Apply > Okay > Next, and the Windows Server should start installing: - While this installs, you can start installing the User Machines.
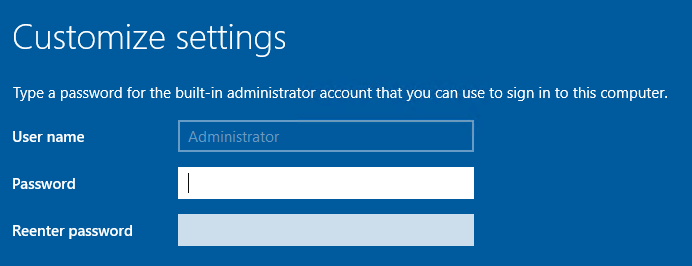
- After the Server finishes installing, you should have the following screen:
- Now, you should be able to login with the password you just set.
- If the screen is small, it’s because you need to Install VMWare Tools.
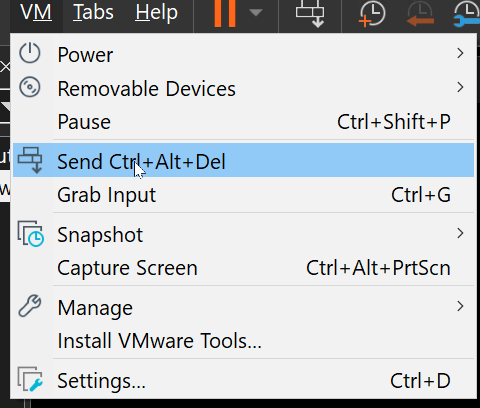
- On the VM, Select
VM > Install VMware Tools. 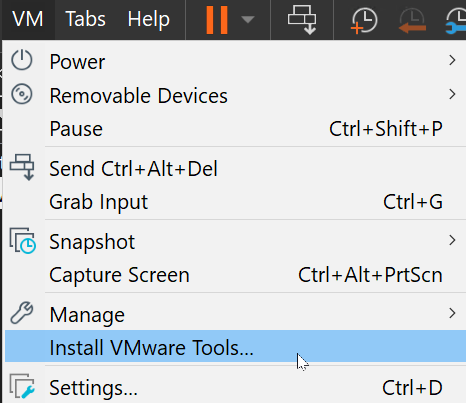
- Alternatively, you can directly download the VMware Tools package here, extract the
.tarwith 7zip, and left-click the.iso. - Open
setup64, clickNextandInstall. 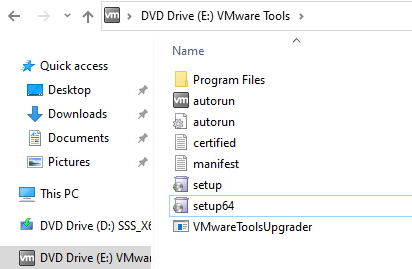
- This should install VMware tools.
- On the VM, Select
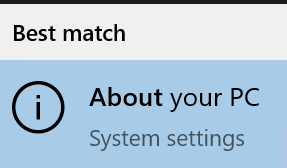
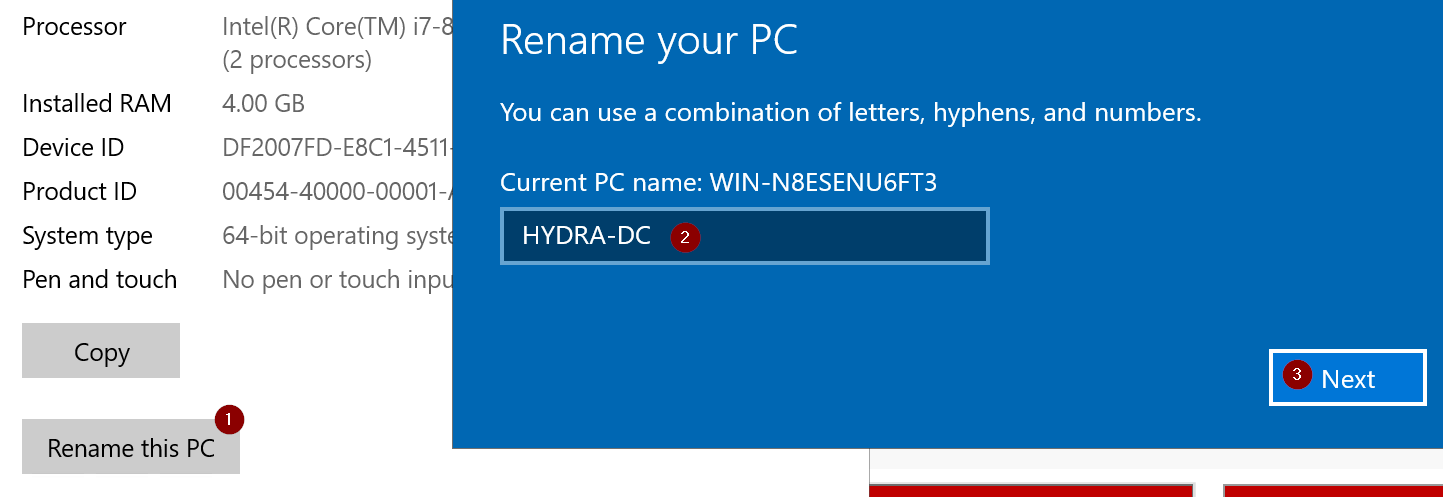
- Rename your PC
Make this machine the Domain Controller
- After logging in, In the Server Manager dashboard, Go to
Manage > Add Roles and Features. - Click
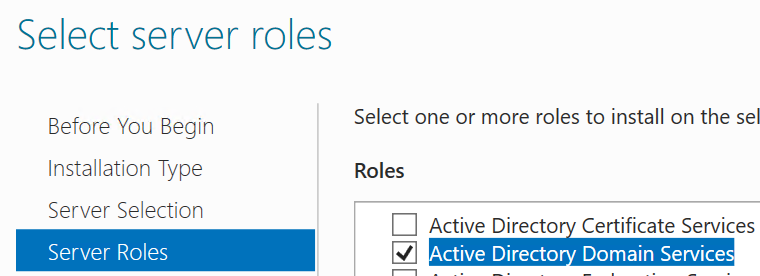
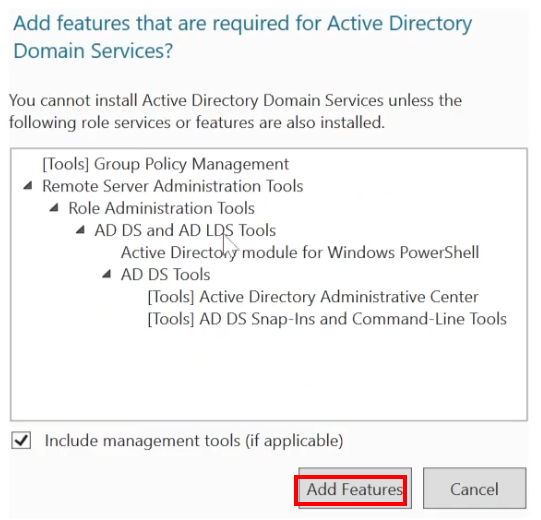
Nextuntil theServer Rolessection, check"Active Directory Domain Services"and clickAdd Features. - Click
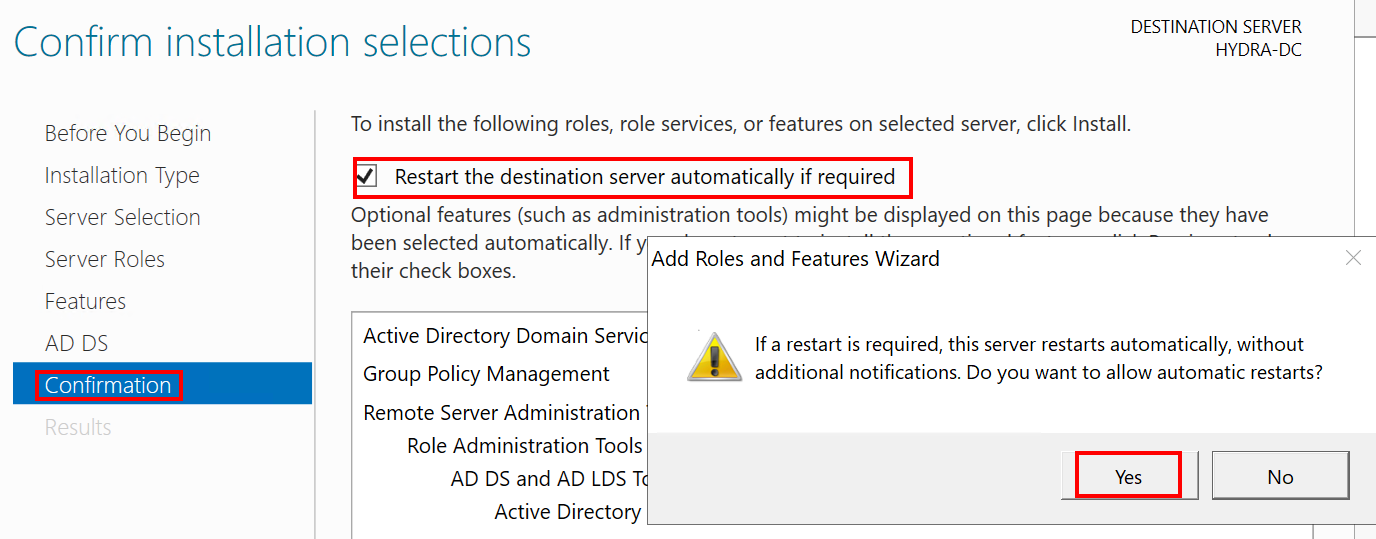
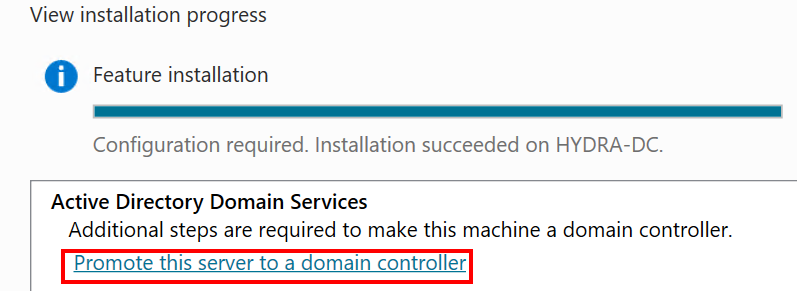
Nextuntil theConfirmationsection, check"Restart the destination server automatically if required", selectYes > Install. - When the installation finishes, Select
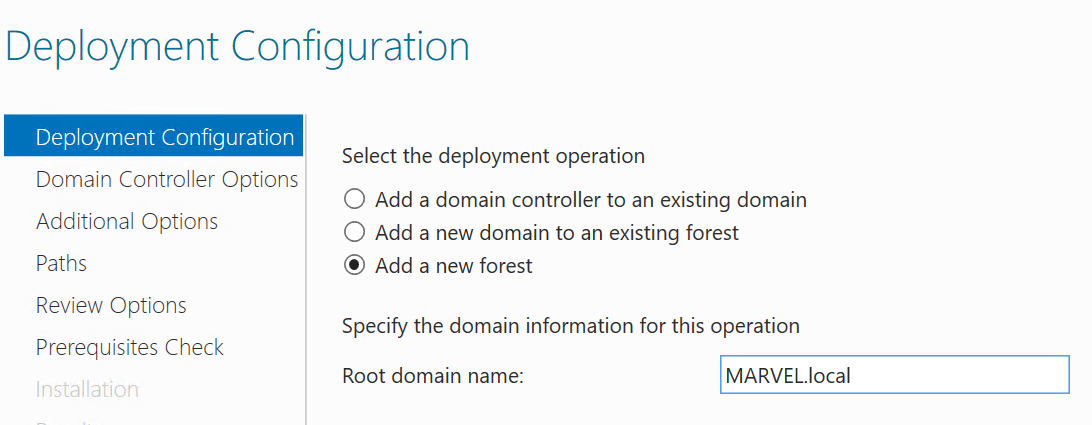
Promote this server to a domain controller. - Select
Add a new forest, choose a domain name, and clickNext. - In the next window, select a DSRM Password and click
Next. - Click
NextuntilPrerequisites check, and ClickInstall. - After installation, click
Closeand restart the Domain Controller VM. - After rebooting, In the Server Manager dashboard, Go to
Manage > Add Roles and Features. - Click
Nextuntil theServer Rolessection, check"Active Directory Certificate Services"and clickAdd Features. - Click
Nextuntil theRole Servicessection and check ifCertification Authority boxis check. - Click
NextuntilConfirmationsection, check"Restart the destination server automatically if required", selectYes > Install. - When the installation finishes, Select
Configure Active Directory Certificate Services on the destination server. - Click
Next. In theRole Servicessection check theCertification Authoritybox. - Click
NextuntilValidity Periodsection, and set the Validity years to99. - Click
NextuntilConfirmationsection, clickConfigure > Close, and reboot your server.
Your Domain Server Initial Setup is finally finished! You can setup the user machines.
Setting up the User Machines
Creating the Users VMs
This is almost identical to Creating the Domain Controller VM, the only difference are:
- Use the Windows 11 Enterprise Evaluation ISO:
- Use the Windows 11 Enterprise as the Version of installation.
- I will name the First machine “THEPUNISHER”, and the Second machine “SPIDERMAN”.
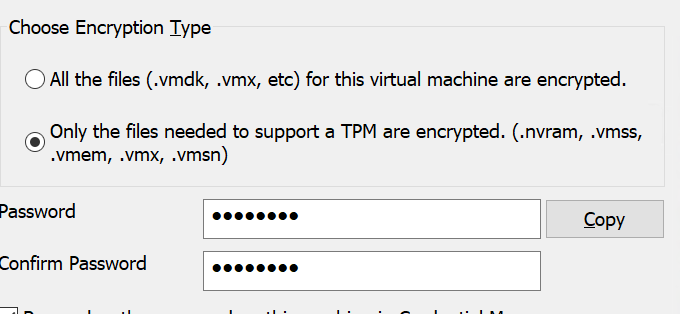
- VMware will ask you for the encryption type, select
Only the files needed to support a TPM are encrypted. - After the installation finishes, select
Sign-in options > Domain join instead.- This will allows us to create an Local Account.
- For the user name, I will use
frankcastleforTHEPUNISHER, andpeterparkerforSPIDERMAN. - For the password, I will use
Password1forTHEPUNISHER,Password2forSPIDERMAN. - For the security questions, I will use
bobfor everything. - Rename the PCs to their VM Name respectively,
THEPUNISHERandSPIDERMAN, and restart them.
Setting up Users, Groups, and Policies on the Domain Controller
- Start the DC (Domain Controller) VM, and search for
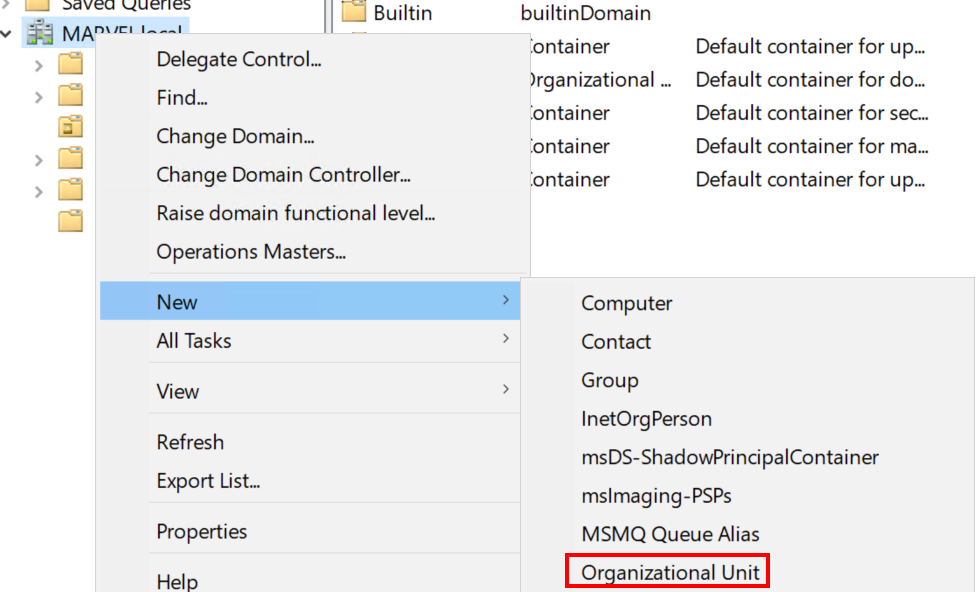
Active Directory Users and Computers, and open it. - Right-click on
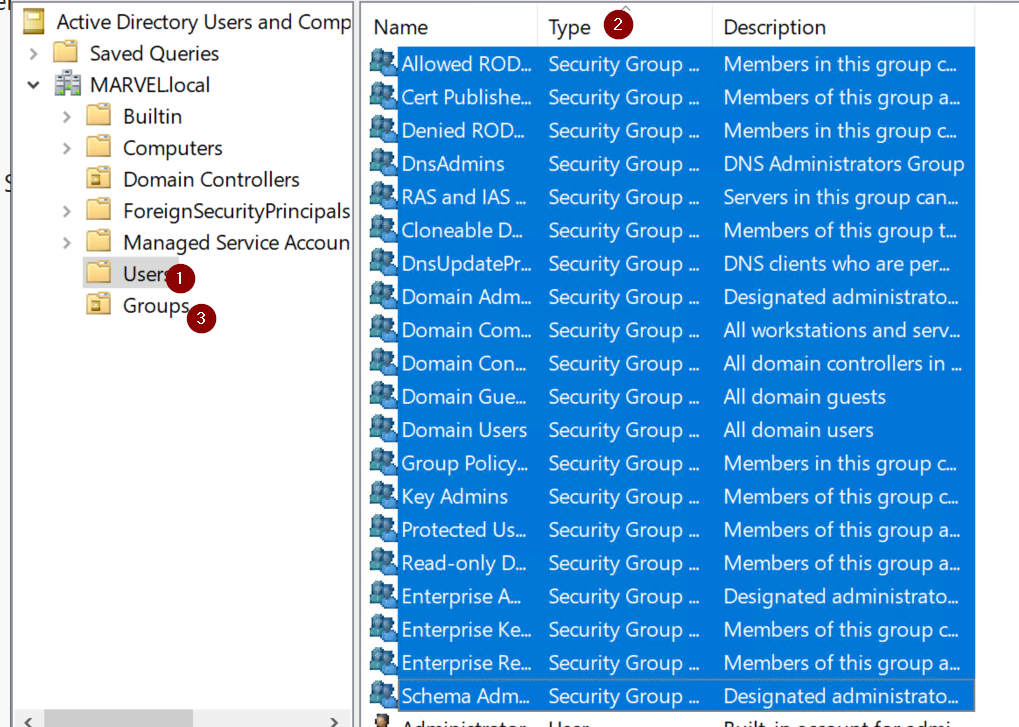
MARVEL.localand selectNew > Organizational Unit. - Name it
"Groups"and clickOkay. - Left-click on the
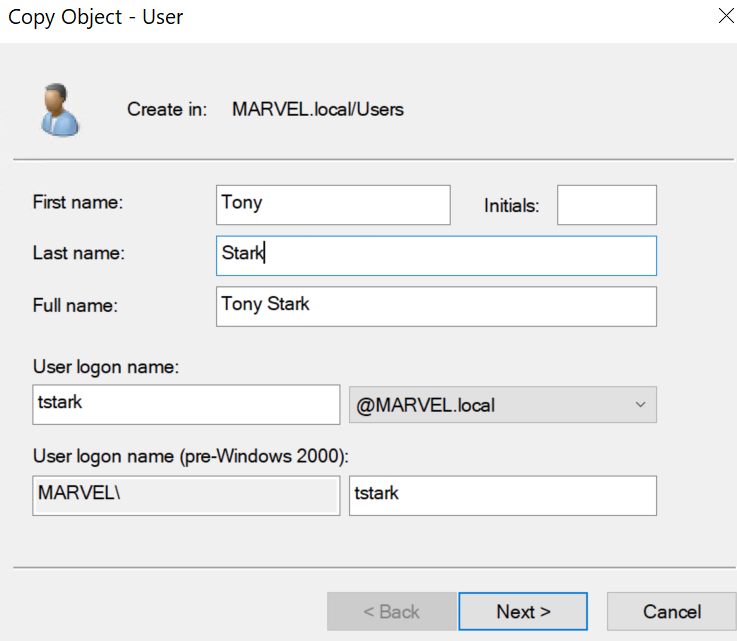
Users, click onTypeto organize users by type, select all Users that belong to the type"Security Group"and drag them to the OU (Organizational Unit) named Groups, that you just created. - Right-click on the Administrator user and select
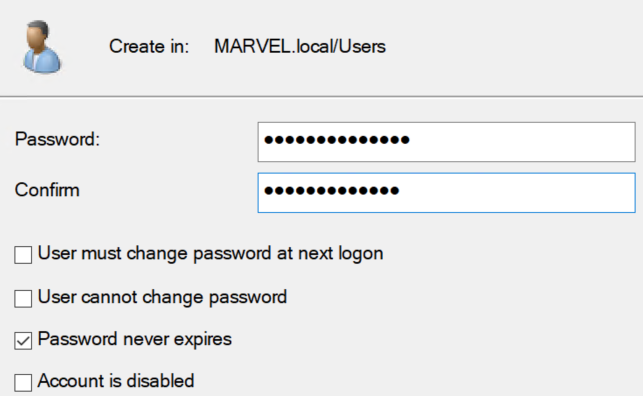
Copy.... - Create the Tony Stark user:
- Create another user the same way you created Tony stark:
- Full Name: SQL Service
- User Logon: SQLService
- Password:
MYpassword123# - Check
Password never expires. - After creating the user, right-click on him, select
Properties, set its description to"My password is MYpassword123#", and selectApply > Okay.
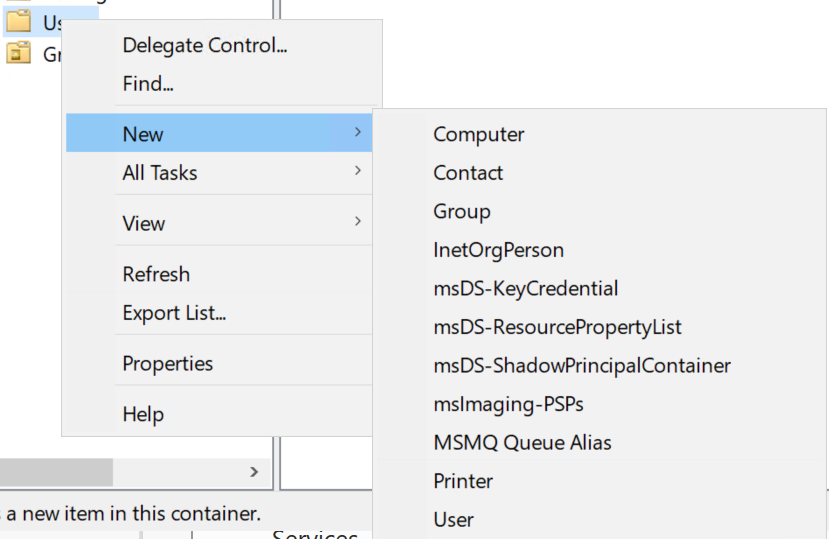
- Right-click on the Users, select
New > User. - Create 2 users with this method:
- First User:
- Full Name: Frank Castle
- User Logon: fcastle
- Password:
Password1 - Check
Password never expires.
- Second User:
- Full Name: Peter parker
- User Logon: pparker
- Password:
Password2 - Check
Password never expires.
- First User:
- In the DC’s Server manager, Go to
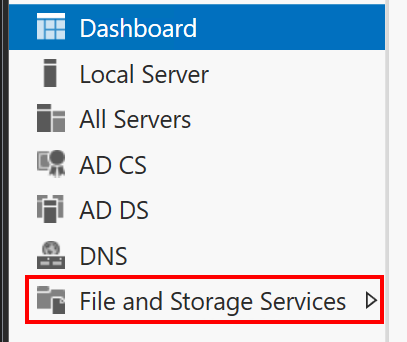
File and Storage Services > Shares > TASKS > New Share. - In the New Share Wizard:
- Select
SMB Share Quick. - Click
Next2 times. - Set share name to
hackme. - Click
NextuntilConfirmation, and clickCreate > Close.
- Select
- Open the
cmd.exeon the DC, and run the following commands:1
setspn -a HYDRA-DC/SQLService.MARVEL.local:60111 MARVEL\SQLService
- Check if the SQLService SPN is found:
1
setspn -l SQLService
Right-click the
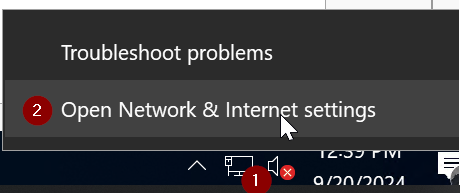
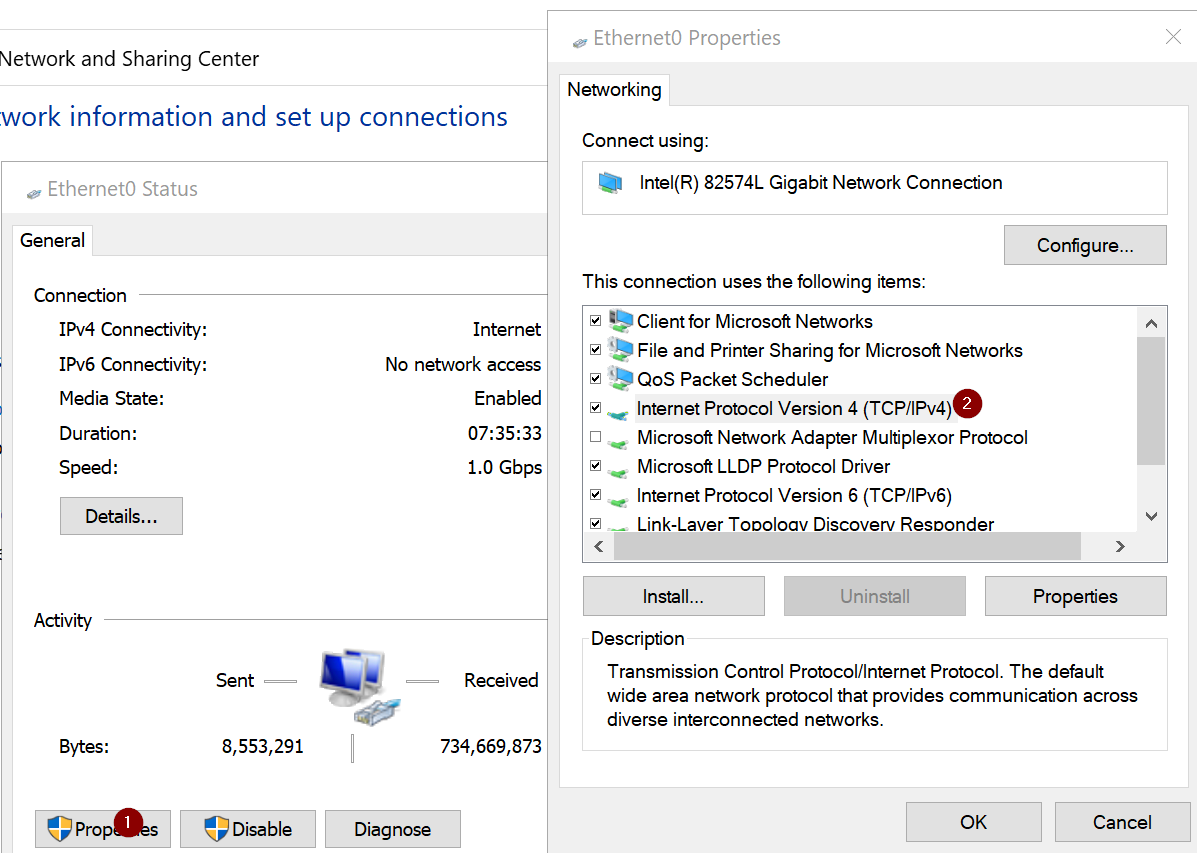
Ethernet/WIFIsymbol and click onOpen Network & Internet Settings.On
Advanced Networksettings, selectNetwork and Sharing Center.On
active networks, click on theMARVEL.localConnection.Next, Go to
Properties > Internet Protocol Version 4 (TCP/IPv4).Open any folder, go to the
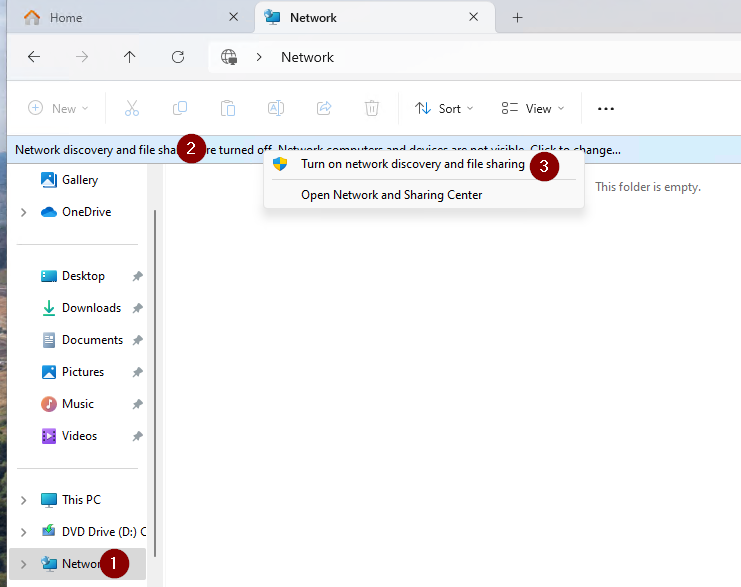
Networksection, click the blue rectangle withClick to Change..., and chooseTurn on Network Discovery and File Sharing:
Now, you just need to make the user machines join the Domain.
Join User Machines to Domain
The final step is to make the user machines join the MARVEL.local Domain.
Repeat the following steps for both User Machines:
- On the Windows search bar, Search for
Control Paneland open it. - Go to
Network and Internet > Network and Sharing Center. - On
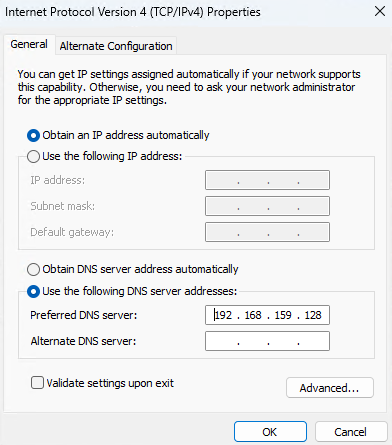
active networks, click on theMARVEL.localConnection. - Next, Go to
Properties > Internet Protocol Version 4 (TCP/IPv4). - For the DNS server address, we will use the IPv4 from the DC :
- Click
Ok > Ok > Close. - In the Windows Search Bar, Search for
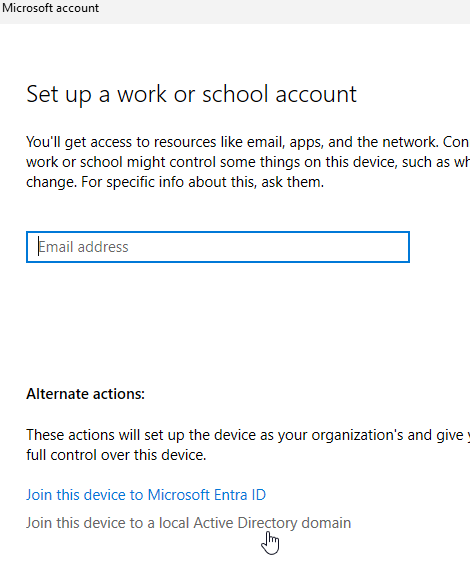
Access Work or Schooland open it. - On this new window, Click on
Connect - Select
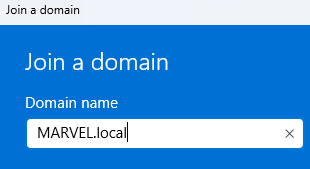
Join this device to a local Active Directory Domain. - Enter the name of your domain in the new window, click
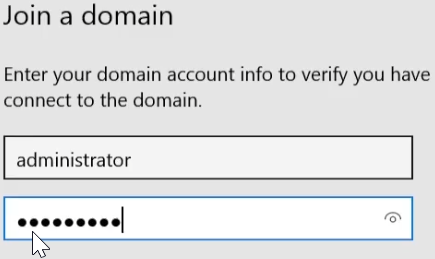
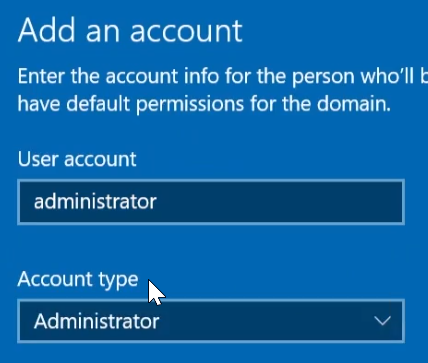
Next, and log in with the Administrator account: - As the
Account type, selectAdministrator. - Click
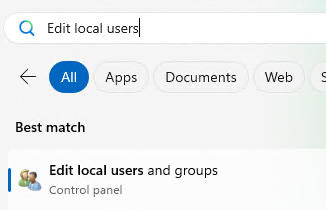
Next > Restart Now. - In the Windows search bar, Search for
Edit local users and groupsand open it: - In this new window, Left-click
Users, Right-ClickAdministratorand SelectSet Password > Proceed. - Set the Administrator password to
Password1!. - Only on the
SPIDERMANmachine, Go toGroups, double left-clickAdministratorsgroup, and clickAdd. - Open any folder, go to the
Networksection, click the blue rectangle withClick to Change..., and chooseTurn on Network Discovery and File Sharing: - Only on the
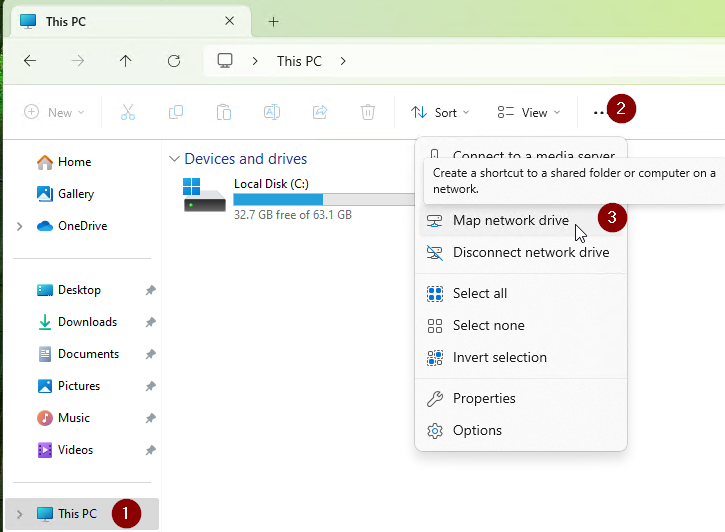
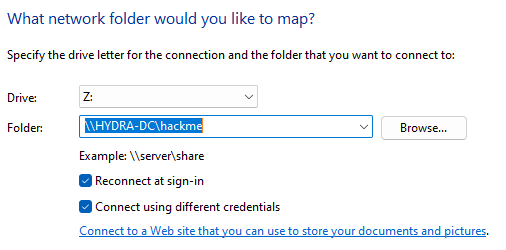
SPIDERMANmachine, Open any folder, go to theThis PCsection, click on the 3 dots, and selectMap network drive. - In this new window, write
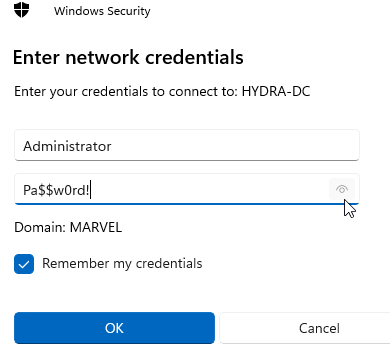
\\HYDRA-DC\hackmein the folder name, checkConnect using different credentials, and clickfinish. - Login using the DC’s Administrator account, and
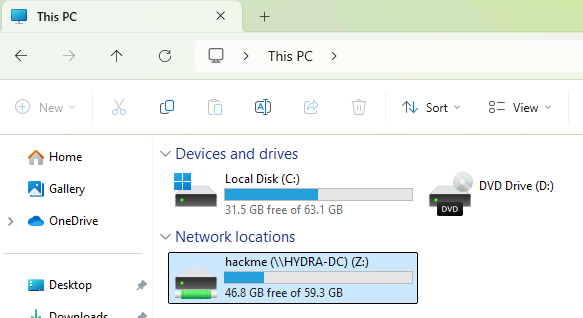
check Remember my credentials: - Now, you should have access to the
hackmeshare as Administrator:
Great job! You’ve successfully built the foundation of our lab.
Now, all that’s left is to add Elastic EDR, and your lab setup will be complete!
Adding Elastic EDR
This section will teach you how to add Elastic EDR to any machine using peasead’s elastic-container.
You will need Docker to run Elastic EDR. You can run Docker either in a virtual machine (VM) or directly on your host OS. I’ll be using a Ubuntu VM in this guide.
Installing Docker
1. Set up Docker’s apt repository.
1
2
3
4
5
6
7
8
9
10
11
12
13
14
15
16
# Add Docker's official GPG key:
sudo apt-get update
sudo apt-get install ca-certificates curl
sudo install -m 0755 -d /etc/apt/keyrings
sudo curl -fsSL https://download.docker.com/linux/ubuntu/gpg -o /etc/apt/keyrings/docker.asc
sudo chmod a+r /etc/apt/keyrings/docker.asc

# Ubuntu
# Add the repository to Apt sources:
echo "deb [arch=$(dpkg --print-architecture) signed-by=/etc/apt/keyrings/docker.asc] https://download.docker.com/linux/ubuntu $(. /etc/os-release && echo "$VERSION_CODENAME") stable" | sudo tee /etc/apt/sources.list.d/docker.list > /dev/null
sudo apt-get update

# Kali Linux
# Add the repository to Apt sources:
echo "deb [arch=$(dpkg --print-architecture) signed-by=/etc/apt/keyrings/docker.asc] https://download.docker.com/linux/debian bookworm stable" | sudo tee /etc/apt/sources.list.d/docker.list > /dev/null
sudo apt-get update
2. Install Docker’s packages.
1
sudo apt-get install docker-ce docker-ce-cli containerd.io docker-buildx-plugin docker-compose-plugin
3. Verify that the installation is successful by running the hello-world image:
1
sudo docker run hello-world
4. Optional, Grant the docker right to the default user.
1
2
sudo groupadd docker
sudo usermod -aG docker $USER
Creating Elastic Container
1. Install elastic container pre-requisites:
1
sudo apt-get install jq git curl
2. Clone the Git repository and navigate to the Elastic container directory:
1
2
git clone https://github.com/peasead/elastic-container.git
cd elastic-container
3. Edit the file .env and change the following settings:
1
2
3
4
ELASTIC_PASSWORD="changeme"
KIBANA_PASSWORD="changeme"
WindowsDR=1
LICENSE=trial # enable 30-day free trial with the platinum features (EDR)
4. Run elastic-container.sh.
1
2
chmod +x ./elastic-container.sh
sudo ./elastic-container.sh start
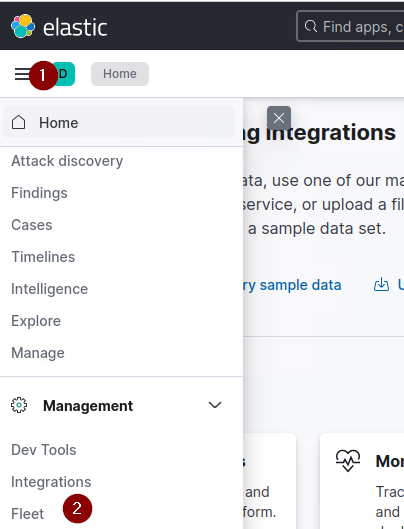
5. Click on the 3 horizontal lines, scroll down, and click on Fleet.
6. Select Add agent.
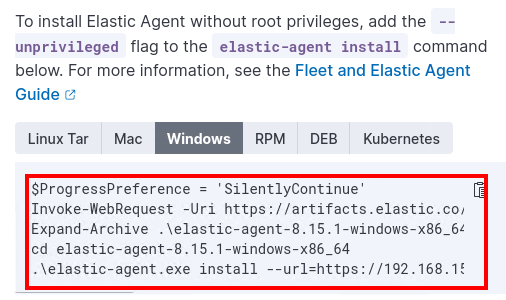
7. Scroll down to Install Elastic Agent on your Host, select Windows and copy the PowerShell script.
8. Now, go to each machine from the AD Lab, and follow these steps:
- Copy the URL from the PowerShell script and paste it into your browser to download the .zip file faster.
- Once downloaded, extract the contents of the
.zipfile. - Run
elastic-agent.exeusing the arguments provided in the PowerShell script. - If you encounter a certificate trust error, add the
--insecureflag to solve it.
9. Now, you should see your machines in the Fleet section of Elastic EDR:
All Elastic EDR container options
1
2
3
4
5
6
7
8
9
10
11
12
# Start
./elastic-container.sh start
# Destroy Containers
./elastic-container.sh destroy
# Stop
./elastic-container.sh stop
# Restart
./elastic-container.sh restart
# Status
./elastic-container.sh status
# Clear all logs
./elastic-container.sh clear
Conclusion
Congratulations! You now have your own fully functional malware lab with Elastic EDR.
I hope this guide was helpful and easy to follow. If you have any questions, feel free to leave a comment or reach out to me directly.
Happy hacking! :)


